
Before we started using KeePass Password Safe as a password manager, we used approximately five different passwords with some variations on different sites. However, once we got a password manager, we realized that we had several hundreds of passwords in different corners of the Internet and no control over who had our passwords and where they went. This guide will show you how get control and to install the open-source KeePass Password Safe step by step on a Windows client computer.
Setting Up KeePass Password manager
Download KeePass
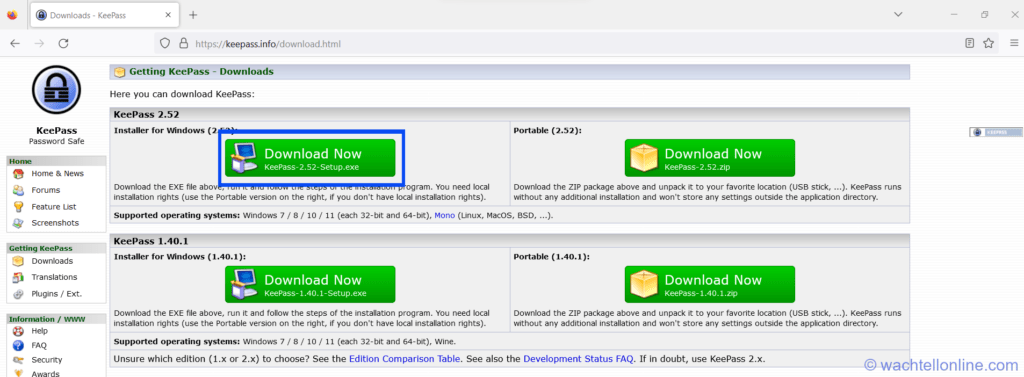
First, you need to download KeePass. Go to the KeePass downloads page, you will see the latest Windows versions at the top. Select the full version and not the portable.
Download the latest version of KeePass to your Downloads folder.
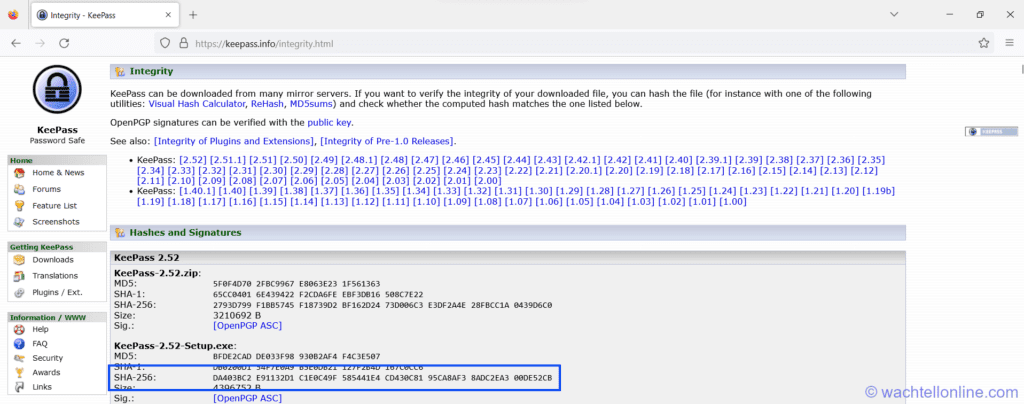
Important: We recommend not executing a downloaded file before checking the hash.
Note: A hash value or digital signature allows you to compare two data sets. Hashes are considered consistent and functional because the same input will always create the same output. Thus, any file changes since the file was created will change the hash value. This way, you can ensure that the downloaded has not been altered since creation.
Checking the hash with PowerShell
Run PowerShell (as administrator) and change the directory to your Downloads directory. It is usually located in the “C:\Users\YourName\Downloads” folder.
Windows PowerShell
Copyright (C) Microsoft Corporation. All rights reserved.

PS C:\WINDOWS\system32> cd "C:\Users\KristianWachtell\Downloads"
PS C:\Users\KristianWachtell\Downloads> Get-Filehash KeePass-2.52-Setup.exe

Algorithm       Hash                                                                   Path
---------       ----                                                                   ----
SHA256          DA403BC2E91132D1C1E0C49F585441E4CD430C8195CA8AF38ADC2EA300DE52CB       C:\Users\KristianWachtell\Dow...
Check with file hash integrity posted on the KeePass website https://keepass.info/integrity.html.
Installing KeePass
In File Explorer, go to Downloads, and now it is time to run and install the KeePass-2.52-Setup.exe file.
During User Account Control: click Yes.
Select Setup Language: Select your preference and click Next.
License Agreement: Select “I accept the agreement” and click Next.
Select Destination Location: Keep the suggestion “C:\Program Files\KeePass Password Safe 2” and click Next.
Select Components: choose “Full installation” and click Next.
Select Additional Tasks: Make sure that “Associate Keepass with the .kdbx file extension” is ticked and click Next.
Click Install.
Click Finish.
Installing KeeAnywhere plugin
First, you need to install a plugin for KeePass. Download the KeeAnywhere plugin by clicking here. Once you have downloaded the file, you can check the hash of the file the same way as described above.
Important: Unfortunately, KeeAnywhere does not post the hash for the KeeAnywhere-2.0.3.plgx file. However, with the algorithm SHA256, we get the following hash when running get-filehash: CD966CFFC2C14BA334BB9F14DE18C41B776850D99AA00A4D4ACA2C0586A6E84C
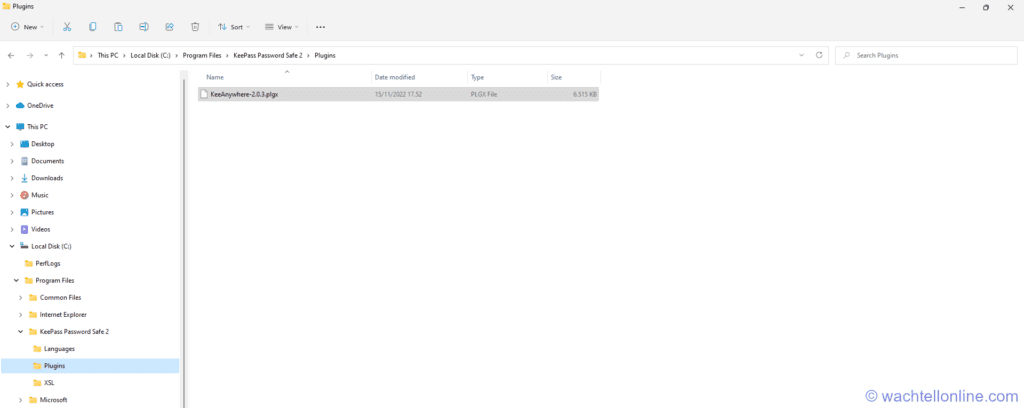
Once downloaded, copy the “KeeAnywhere-2.0.3.plgx” file to the C:\Program Files\KeePass Password Safe 2\Plugins folder.
Note: If you have right-clicked to run PowerShell as “Run as administrator”, you can copy the “KeeAnywhere-2.0.3.plgx” file directly from PowerShell.
Windows PowerShell
Copyright (C) Microsoft Corporation. All rights reserved.

PS C:\WINDOWS\system32> cd "C:\Users\KristianWachtell\Downloads"
PS C:\Users\KristianWachtell\Downloads> get-filehash KeeAnywhere-2.0.3.plgx

Algorithm       Hash                                                                   Path
---------       ----                                                                   ----
SHA256          CD966CFFC2C14BA334BB9F14DE18C41B776850D99AA00A4D4ACA2C0586A6E84C       C:\Users\KristianWachtell\Dow...

PS C:\Users\KristianWachtell\Downloads> Copy-Item -Path "KeeAnywhere-2.0.3.plgx" -Destination "C:\Program Files\KeePass Password Safe 2\Plugins"
PS C:\Users\KristianWachtell\Downloads>
You can also copy using File Explorer.
Restart KeePass, and it will load with the plugin. In KeePass, click Tools and click KeeAnywhere Settings.
KeeAnywhere settings step by step
In KeeAnywhere Settings, check Local User Secure Store, click add and select the cloud provider of your choice. You need the login and credentials for your cloud provider. This example illustrates OneDrive, but you can use any shared folder (e.g., Google Drive, Dropbox, Azure files) as long as you can access the folder from your other devices. If you have any issues integrating your cloud drive, you also might like Keepass Password Safe cloud drive integration step by step.
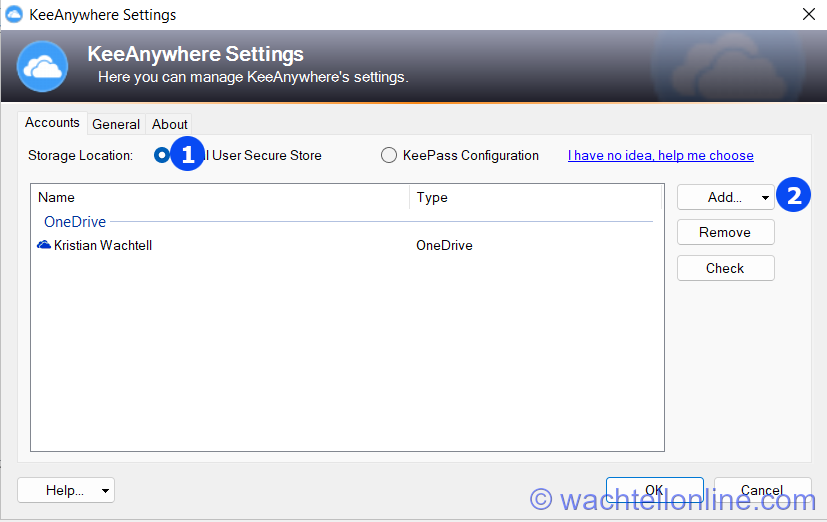
Once you are done, click OK.
Installing the KeePass database
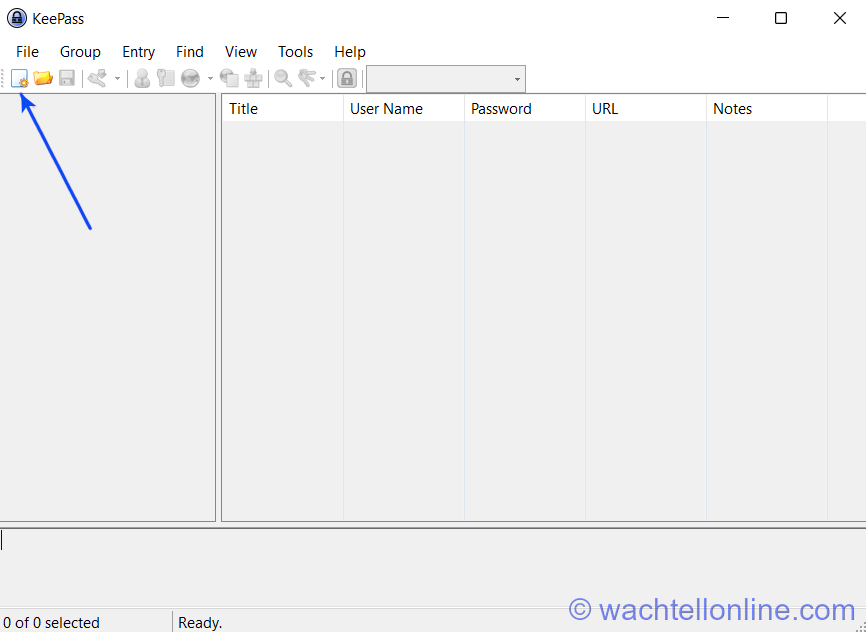
Once installed, you get this screen it is time to prepare your KeePass database. The best way is to store the database on your preferred cloud host (e.g., OneDrive, GoogleDrive) and have the password and access key on your local device. Click New Database.
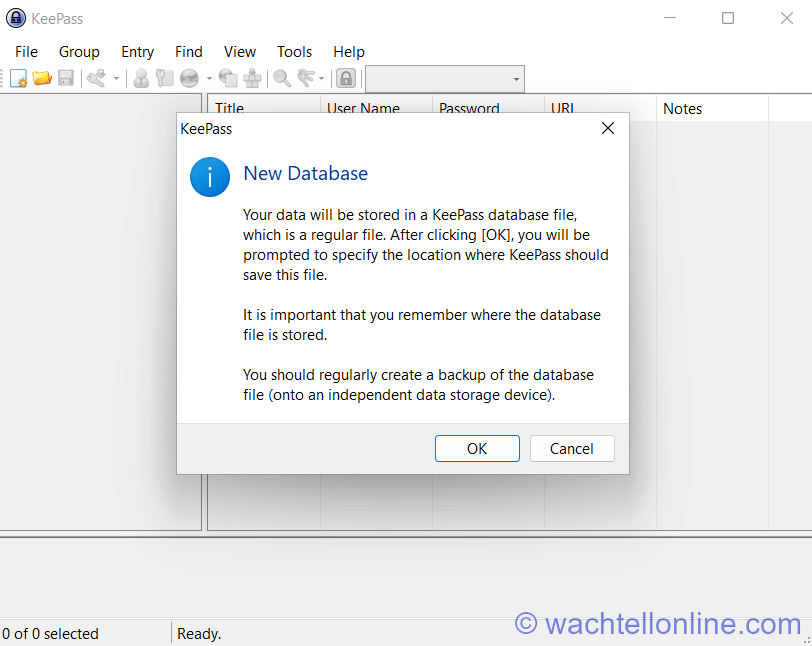
A new screen pops up, reminding you to remember the path to the database and that you should remember to back up your KeePass database. Backing up the KeePass Password Safe is not something you should worry about since there is nothing in it. However, we have a separate step-by-step tutorial on backing up the KeePass database.
Click OK and save the database file to your cloud provider directory. In this example, we have created a folder KeePassDB in OneDrive and named the KeePass database file “KeePass Database.kdbx”.
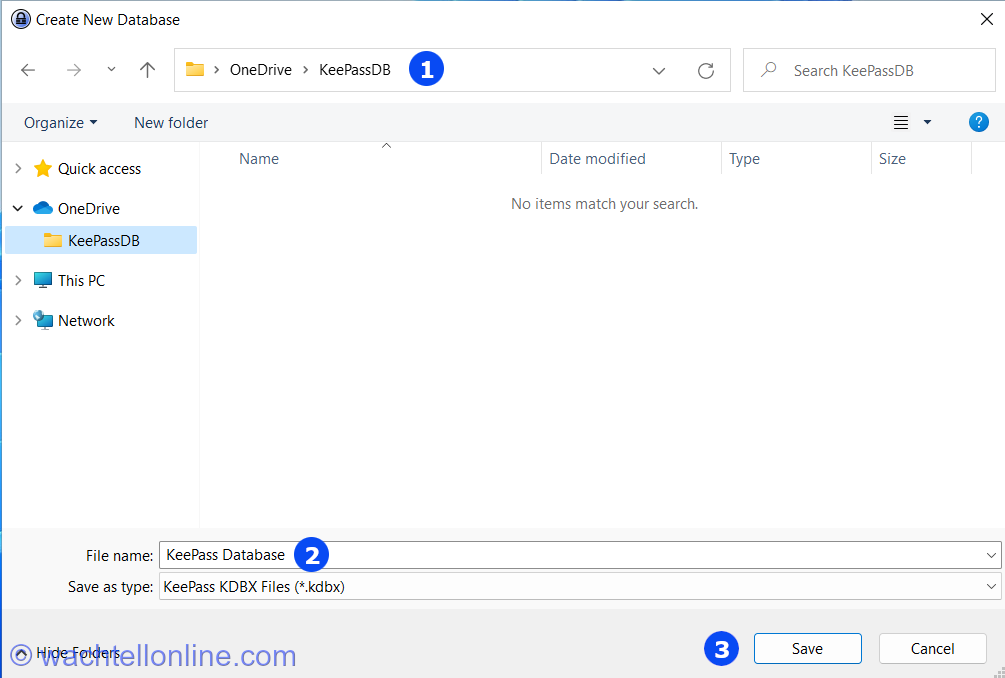
Click Save. You are now done creating the KeePass database.
Creating the master password and key file
The next will be to choose a password and create the key file. Start by creating the master password.
Note: As you can see below, we have chosen a password that can be remembered, “The Cat ate 3 mice and liked it!!!” This password has a strong estimated quality (>150 bits) but is still possible to remember. It would take a computer about 19 quindecillion years to crack that password. However, we can remember the password because cats like to catch mice. Even a shorter password, “The Cat Ate 3 Mice!!!” has over 100 bits and will take years to crack. However, my old password, “Panda123” only takes a computer an hour to crack.
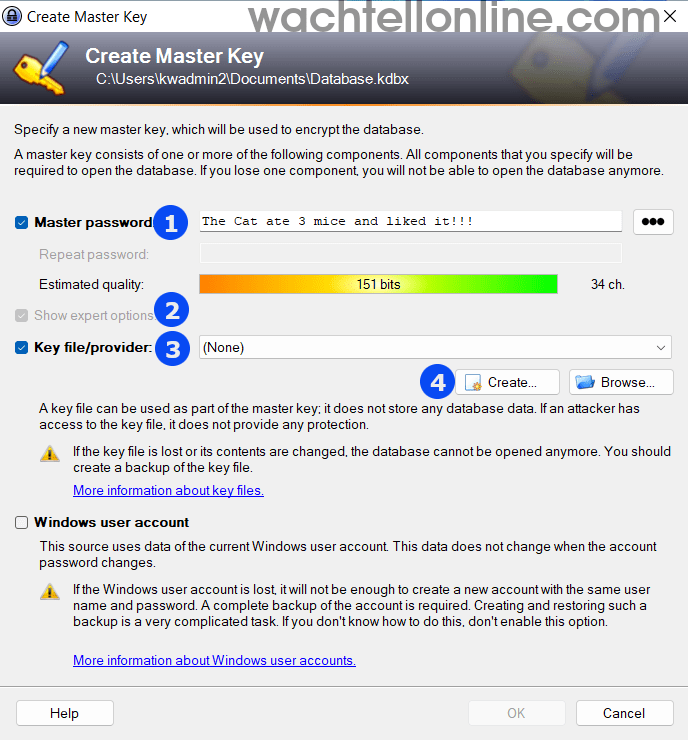
Continue creating the KeePass key file by ticking the Show expert options.
Click Key file/provider
Click Create…
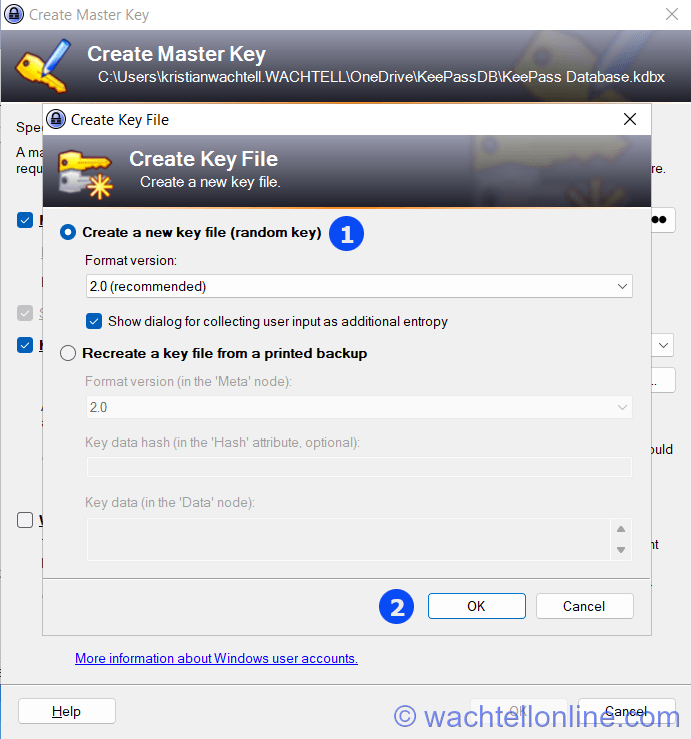
Select Create a new key file (random key) and click OK.
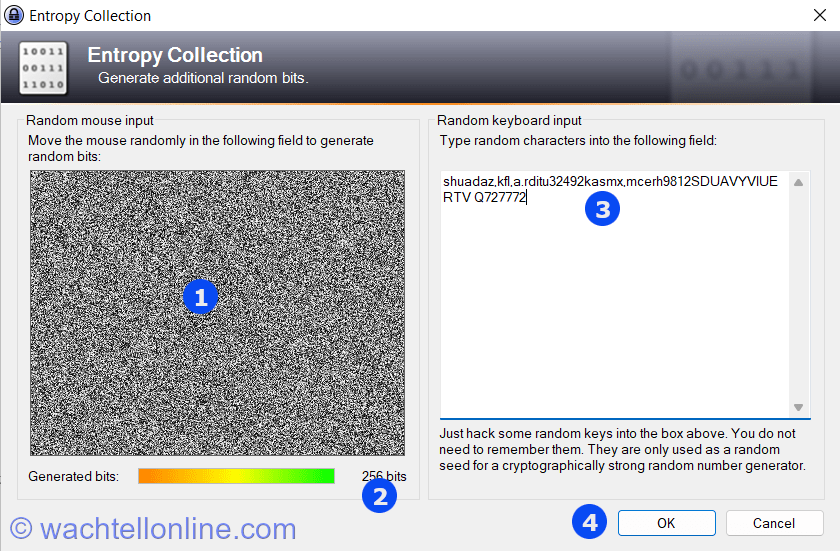
In the entropy collection, move the mouse randomly in the gray square to gene random bits until you have generated 256 bits. Type random keyboard input and click OK.
Create a directory named C:\KeePassKey and click Save to save the KeePass key.
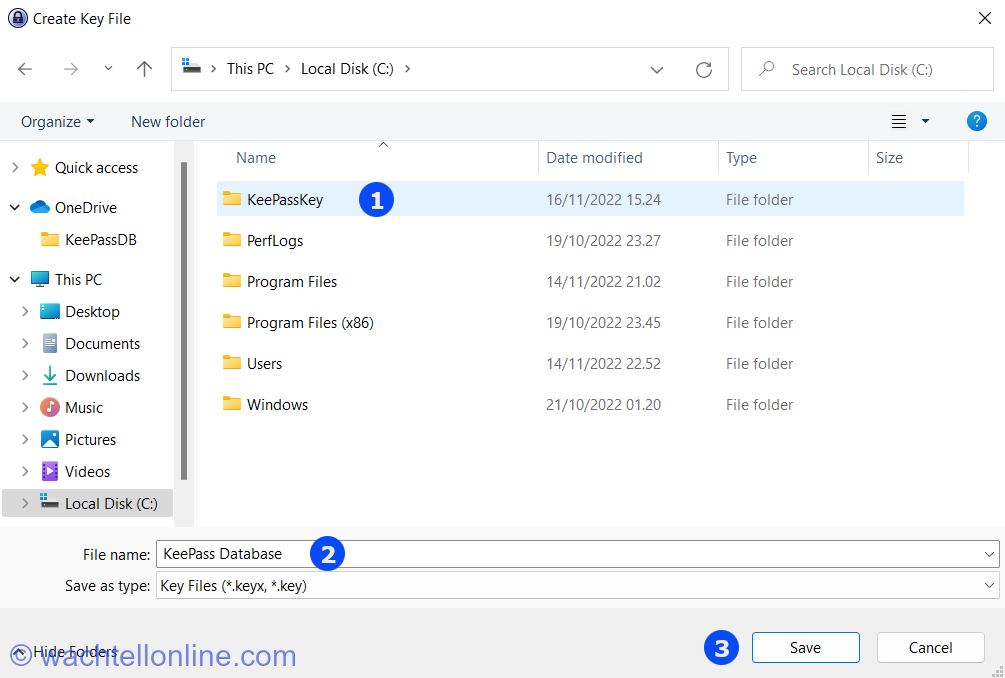
Once the KeePass Key is saved in the C:\KeePassKey directory. Click OK.
Important: We do not recommend installing the KeePass key on a USB Flash drive as we consider USB unsafe unless it is an IronKey USB or equivalent.
Configuring the new database
Create your database and your default user name; you usually use your email address the most.
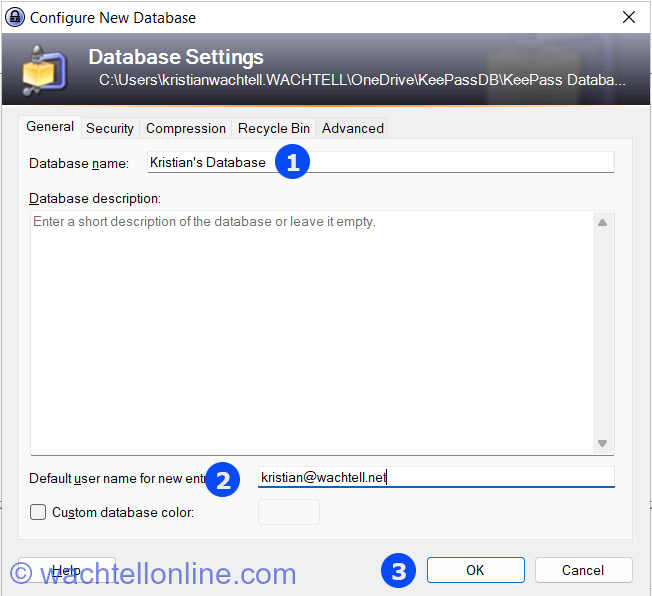
Navigate to the Security tab and change the database file encryption algorithm to ChaCha20.

You can increase the iterations (optional). This will make your database key safer but also slower. Click OK.
Printing the KeePass Emergency Sheet
Before printing the Emergency Sheet, tick off the “Also print a key file back up”. Click Print to print the KeePass Emergency Sheet.
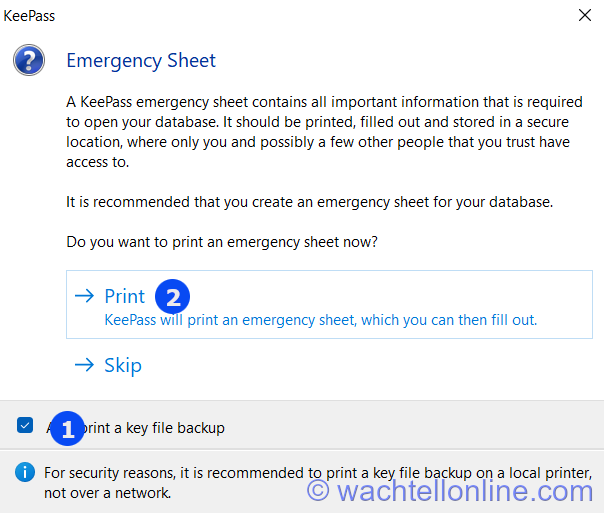
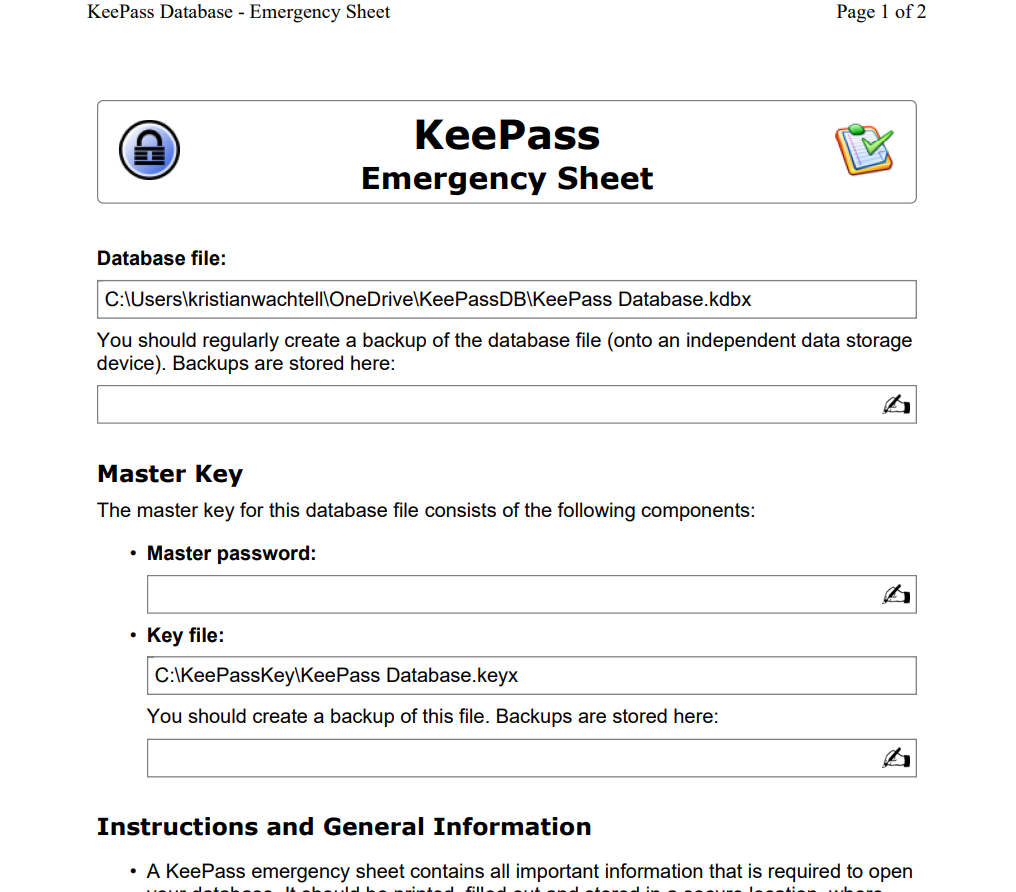
The KeePass Emergency Sheet has all the information necessary to get into KeePass Database.
Important: Do not skip printing the KeePass Emergency Sheet, and make sure you keep it in a safe place. We also recommend that you make a copy of the key file saved in C:\KeePassKey folder. There is no backdoor into a KeePass database and no “I forgot the password”-button to press.
Print on your printer and tell your relatives where it is.
We have not discussed backup, which obviously is important. However, we have a separate step-by-step tutorial on backing up the KeePass database.
Testing the new KeePass database with two dummy passwords
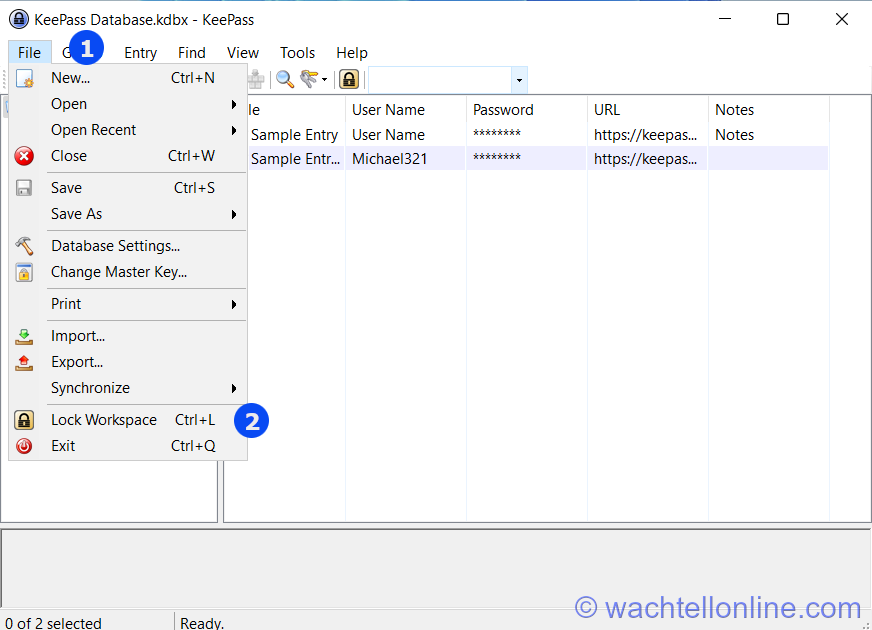
Before entering your passwords, we will test the data to check that you can log in to the database with the key file. Lock the KeePass database by clicking File and Lock Workspace (Ctrl+L).
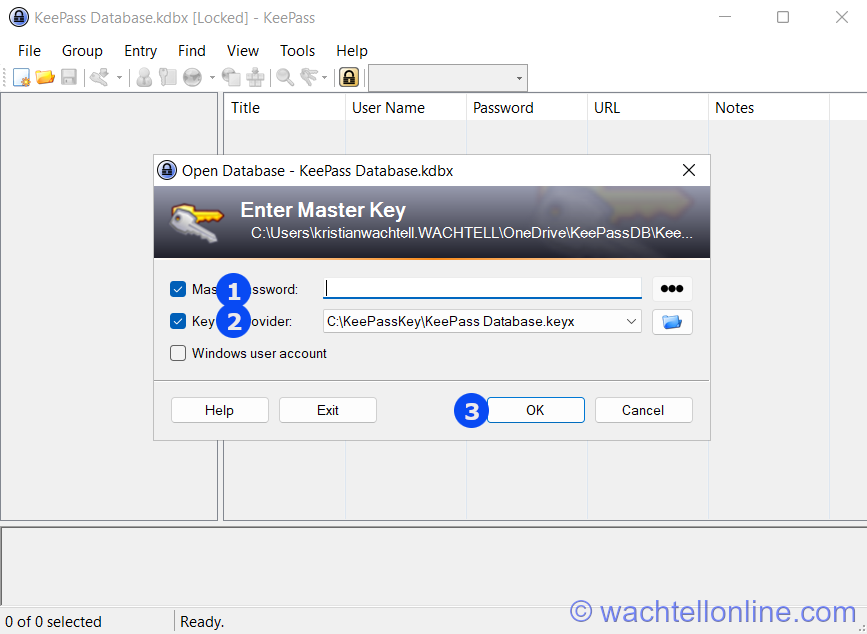
Log in using your master password. Make sure that Key file/provider is ticked and the path leads to the folder on your C drive. Click OK.
Welcome to your new password database. Now it is time to add your passwords to the database. You might want to look at this post Setting up passwords in KeePass. In addition, there are additional features to be unlocked, like integration of KeePass in your default browsers as well as to your phone and other devices. In addition, you can have automatic backup and download favicons to your KeePass Password Safe.
Conclusion
You have learned to download and set up KeePass Password Safe with a cloud-based database by adding the KeeAnywhere plugin. You have learned to access Keepass Password Safe from your desktop. The next step is to use all your passwords everywhere you use passwords. You may like our post regarding password strategy. Some passwords need to be longer than others.
Did you enjoy this article? You may also like KeePass Password Safe integration with iPhone. Don’t forget to follow us and share this article.

KRISTIAN WACHTELL is passionate about IT and safety on the Internet. He started using Information Technology at a very young age, and his goal is to teach and inspire others to use the Internet safely to preserve privacy. Read more »